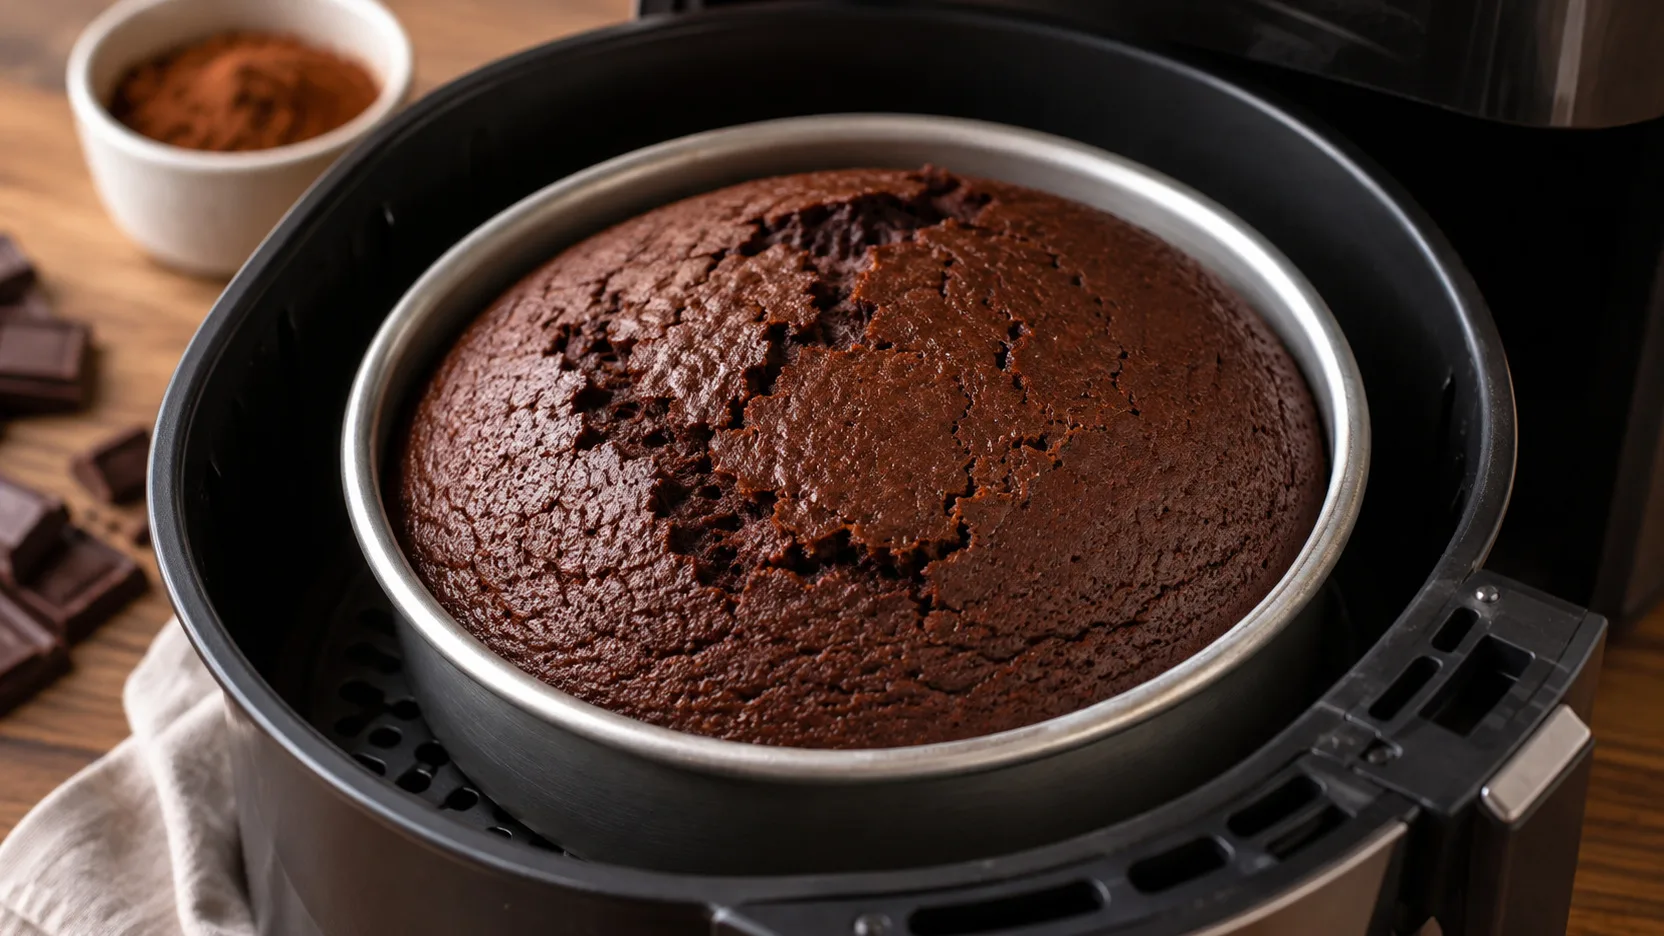
This method uses a small round pan and a relatively low layer of batter to lessen the difference between the intense heat reaching the top and the time needed to bake the center. The point is guided by signals from the cake, and not just by the clock, because power, shape of the basket and position of the resistance vary between devices.
Ingredients
For the dough
• 1 large egg
• 100 g of sugar
• 45 ml of neutral vegetable oil
• 100 ml of whole milk
• 110 g of wheat flour
• 30 g of 50% chocolate powder
• 1 g of salt, about 1 generous pinch
• 5 g of chemical yeast powder
To prepare the mold
• 1 teaspoon of oil or butter
• 1 teaspoon of chocolate powder
Preparation method
1. Choose and prepare the shape
Use a round metal mold measuring 15 cm in diameter and approximately 5 cm in height. Before starting, make sure it fits into the basket without getting stuck in the walls and, preferably, leaves space around it for air to circulate. Grease the bottom and sides with oil or butter and
sprinkle with chocolate powder, removing excess.
2. Aqueça a air fryer
Adjust the air fryer to 160 °C for about 3 minutes, if your model recommends it or if you usually get more regular results with preheating. For appliances whose manual does not require this step, start with the cold basket and consider that the cake may need a few extra minutes at the end.
3. Mix the liquids
In a bowl, beat the egg with the sugar for about 1 minute, just until the mixture becomes smoother and slightly aerated. Add the oil and milk and stir until uniform.
4. Finish the dough without overmixing
Add the flour, chocolate powder and salt. Mix with a whisk or spatula just until no dry pockets remain. Lastly, incorporate the yeast with short movements. The dough should be fluid, but with body, and weigh approximately 440 g. In the 15 cm form, it occupies almost half the height or a little less, leaving room to grow.
5. Start roasting at a moderate temperature
Place the pan in the center of the basket and bake at 160°C for 18 minutes without opening. In oven-type models, use a lower position, moving the cake away from the upper heating element. The moderate temperature gives more time for the heat to reach the center before the top darkens too much.
6. Check the top before continuing
After 18 minutes, open quickly. If the surface is firm, still relatively light and without signs of burning, close and continue baking uncovered. If the top is already very dark while the center still appears soft, protect only the top part of the mold with a metal lid suitable for the device or another solution permitted by the manufacturer. Aluminum foil should only be used if your model's manual allows it and must be firmly attached to the edge of the pan, never loose inside the basket or covering the bottom of the air fryer.
7. Bake until the center reaches the point
Continue at 160°C for another 7 to 14 minutes. Start testing after 25 total minutes. Stick a toothpick in the center: it should come out without any liquid batter, and may contain some moist crumbs. If there is still raw dough, bake in 3-minute blocks and repeat the test. The total time is usually between 25 and 32 minutes for this quantity and geometry, but the observable point has priority.
8. Rest before unmolding
Remove the pan from the air fryer and let the cake rest for 10 minutes. Use a thin spatula around the edge, unmold and wait for it to cool before cutting. This rest helps the structure of the crumb to firm up without prolonging cooking inside the air fryer.
Right spot / how to know it’s ready
The top should be dry to the touch, with small cracks and slight resistance when pressed in the center. The edges may begin to slightly pull away from the shape. The toothpick inserted in the central part should come out without liquid dough; some moist crumbs are desirable for a tender cake. If the center jiggles like liquid or the stick is covered in shiny batter, it still needs to bake.
Tips for the recipe to work out
Prefer defined diameter and depth
The capacity in liters of the air fryer alone does not tell you how the cake will bake. For this dough, the 6-inch by 2-inch pan keeps the raw layer low enough so the center cooks before the top dries.
Do not increase the temperature to save time
Starting at 180°C or higher can brown and harden the surface too soon, especially when the resistance gets close to the pan. The 160 °C range is intentional to allow for the center.
Evite abrir nos primeiros 18 minutos
Opening too soon lowers the temperature just when the yeast and cake structure are forming. Only carry out the first check when the surface has already started to firm up.
Use overhead protection only when necessary
Covering from the beginning is not mandatory in this method. Protection comes in when the top is already firm and darkens faster than the center. This way you reduce the risk of a burnt surface without unnecessarily delaying the start of baking.
Adjust according to the behavior of your device
If the cake tends to burn on top, use the lowest setting available and maintain 160°C. If your appliance bakes more gently, the time may approach the upper limit. Registre o tempo que funcionou no seu modelo para repetir com mais precisão.
Substitutions and variations
50% chocolate powder can be exchanged for 25 g of 100% cocoa powder. The cake will be darker and less sweet; to maintain a closer profile, add about 10 g of sugar.
Whole milk can be replaced with the same amount of unsweetened vegetable drink. The texture may be a little less smooth depending on the fat content of the drink chosen.
The oil can be replaced with 45 g of melted butter. The flavor is more buttery, but the crumb tends to firm up more after cold.
A 16 cm pan makes the dough smaller and can reduce the time by around 2 to 4 minutes. A 14 cm pan makes the layer deeper and may require an additional 4 to 8 minutes, increasing the chance that the top will need protection.
How to store
After cooling completely, keep the cake tightly closed in a container or film. Without a perishable coating, it retains its texture best for about 2 days in a cool, dry place. In the refrigerator, it can be kept for up to 4 days, although it will become firmer; Let it come to room temperature or heat a slice for a few seconds before serving.
To freeze, cut into slices, wrap individually and place in a container or freezer bag for up to 2 months for best quality. Thaw in the refrigerator or at room temperature long enough to lose surface ice.
If you add whipped cream, cream, cream cheese or another topping that requires refrigeration, keep the cake refrigerated and do not leave the perishable preparation out of the refrigerator for more than 2 hours.
How to serve / side dishes
Serve warm or at room temperature. Coffee, milk and tea combine with the chocolate flavor. For dessert, a small portion of ice cream or fresh fruit adds contrast without having to change the dough.
Common mistakes
Why did the cake burn on top and remain raw in the center?
The most common cause is combining high temperature with a narrow or very deep pan, leaving a thick layer of dough near the upper resistance. Use the indicated pan, bake at 160°C and protect the top only after it has set, if it is really getting dark early.
Why was the cake dry?
The time has exceeded the point or the effective temperature of the device is higher than that indicated on the panel. Start the test at 25 minutes and remove when the toothpick comes with moist crumbs, without waiting for it to come out completely dry.
Why did the center sink after leaving the air fryer?
The cake may have been removed before the central structure has set, or the basket may have been opened too soon. Confirm the center with a toothpick and avoid interrupting baking for the first 18 minutes.
Why did the dough boil over?
The mold was too full or was too low for the quantity used. In this recipe, the dough should occupy a maximum of approximately half of a 15 cm by 5 cm pan, leaving room for expansion.
Frequently asked questions
Can I use silicone mold?
You can, as long as it is suitable for high temperatures and fits comfortably in the basket. As silicone conducts heat more slowly than metal, the center may require a few additional minutes. Support very flexible molds carefully so as not to spill the dough when placing them in the appliance.
Do I need to use aluminum foil?
No. The method was set up to start without coverage. Only consider protecting the top if it is firm and darkening while the center has not yet set, and only if your device's manufacturer permits this use.
Can I do it without preheating?
Yes. If your model's manual does not call for preheating, place the pan in the cold basket and use the same 160°C. The final time may increase by a few minutes, so keep the toothpick test as your main reference.