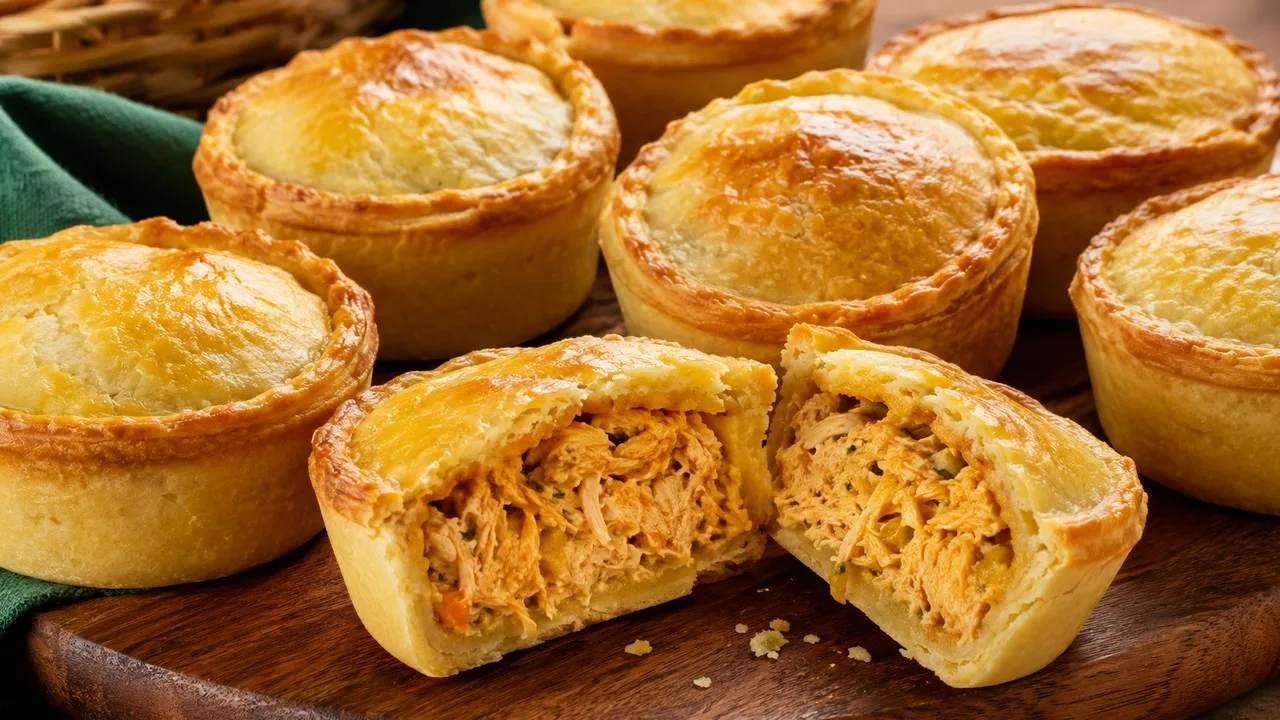
Ingredients
For the chicken
• 600 g skinless, boneless chicken breast
• 900 ml of water
• 4 g of salt
For the filling
• 15 g of olive oil or neutral oil
• 120 g of onion, chopped into small cubes
• 8 g minced garlic
• 150 g seedless tomatoes, in small cubes
• 4 g paprika or sweet paprika
• 20 g of wheat flour
• 150 ml of chicken cooking broth
• 100 ml of whole milk
• 60 g pitted green olives, chopped
• 15 g chopped parsley
• 3 g of salt, or to taste after tasting
• Black pepper to taste
To the rotten dough
• 500 g of wheat flour
• 280 g of very cold unsalted butter, in 1 to 1.5 cm cubes
• 2 large eggs, approximately 100 g without shell
• 8 g of salt
• 15 to 30 ml of ice water, only if necessary
To assemble and finish
• 2 gems
• 10 ml of water
Preparation method
1. Cook and shred the chicken
Place the chicken breast, 900 ml of water and 4 g of salt in a medium saucepan. Heat over high heat until it starts to boil, lower to maintain a gentle simmer and cook until the thickest part of the chicken reaches 74°C in the center. On medium pieces, this usually takes about 15 to 20 minutes after the water comes to a gentle boil. Remove the chicken, reserve at least 200 ml of the broth and shred the meat while it is still warm.
2. Make a moist filling, but without loose liquid
Heat the olive oil over medium heat. Sauté the onion for 4 to 5 minutes, until soft and translucent. Add the garlic and stir for about 30 seconds. Add the tomatoes and paprika and cook for 4 to 6 minutes, until the tomatoes have softened and the visible moisture in the pan has almost disappeared.
3. Connect the filling
Add the shredded chicken and 150 ml of the reserved broth. Mix and cook for 3 to 5 minutes, until there is no juice accumulated at the bottom. Sprinkle the 20 g of flour over the chicken and stir for 1 minute. Add the milk little by little, stirring constantly, and cook for another 2 to 3 minutes. The filling should be creamy and cohesive, without running out. Turn off the heat, mix the olives and parsley, adjust salt and pepper and spread the filling on a plate or baking sheet to cool completely for about 30 minutes.
4. Mix the dough without kneading
In a large bowl, whisk together the flour and salt. Add the cold butter and press the cubes with your fingertips into the flour, working just until you have a coarse crumb with small pieces of butter still visible. Add the eggs and mix just until the dough starts to come together. Squeeze a portion in your hand: if it doesn't hold its shape, add ice water 5 ml in 5 ml, just until it binds. Don't knead.
5. Rest the dough
Divide the dough into two parts: about two-thirds for the bases and one-third for the lids. Flatten each portion into a disk, wrap and refrigerate for 25 to 30 minutes. This rest firms the butter and reduces the risk of the dough shrinking or becoming oily during shaping.
6. Standardize the bases
Separate 16 medium metal pie molds, measuring approximately 6.5 to 7 cm in diameter at the mouth and 2.5 to 3 cm in height. No need to grease. Weigh out about 37 to 38 g of dough for each base. Flatten the portion, place it in the center of the mold and press from the bottom to the sides, seeking
thickness approximately 3 mm. Leave a small excess of dough above the edge to make sealing easier.
7. Fill without overloading
Distribute approximately 38 to 40 g of the completely cold filling into each mold. The filling should come close to the edge, but without forming a high mound; leave about 2 to 3 mm free for the lid. Avoid compressing the filling, as this makes it difficult to seal and may force the dough to crack.
8. Open the lids and seal
Weigh 14 to 15 g portions of the reserved dough for each lid. Roll out each portion between two pieces of plastic or baking paper until about 2.5 to 3 mm thick. Cover the pie, press the lid against the base and remove the excess close to the edge. The seam must be closed, but without squeezing the dough until it becomes too thin.
9. Cool and preheat the oven
Mix the egg yolks with 10 ml of water and brush a thin layer over the lids. Place the assembled pies in the refrigerator for 15 minutes. Meanwhile, preheat the oven to 190°C for at least 20 minutes, with the rack in the center position.
10. Bake until golden brown
Place the molds on a baking tray and bake at 190°C for 35 to 40 minutes. Rotate the pan halfway through cooking if the oven browns unevenly. Remove when the tops and edges are golden brown and firm. Wait 10 to 15 minutes before unmolding; the dough gains strength as it cools a little.
Right spot / how to know it’s ready
The filling is ready before assembly when it is moist and creamy, but does not release juice when pushed to one side of the pan. As you pass the spatula along the bottom, the path should remain visible for a second or two before the filling returns to occupy the space.
The raw dough is done when a portion pressed in the hand holds together, but the dough is not elastic or sticky. If it is crumbling into powder, you need a few milliliters of ice water; If it's soft and shiny, it's too hot and should be put back in the refrigerator.
The pies are baked when the top is evenly browned, the edge is firm and dry and the dough comes away from the pan without folding after 10 to 15 minutes of rest. The bottom should be cooked through and lightly browned, not pale or wet.
Tips for the recipe to work out
Work with the cold filling
Hot filling softens the butter in the dough and transfers steam to the base, which favors a moist bottom and fragile dough. Spreading the filling on a wide surface speeds up cooling.
Weigh dough and filling
Using around 37 to 38 g for each base, 14 to 15 g for each lid and 38 to 40 g of filling per unit makes the thickness and baking time more uniform. Standardization also reduces pies that crack due to overfilling.
Do not knead rotten dough
Mix just until the dough comes together. Excessive work develops more gluten and tends to make the shell harder and less brittle.
Prefer metallic molds
The metal conducts heat efficiently and helps dry and brown the bottom. If you use silicone, the bottom tends to brown more slowly and may require a few extra minutes in the oven.
Wait before unmolding
The pie fresh from the oven is very hot and fragile. Resting for 10 to 15 minutes allows the fat and structure of the dough to stabilize without letting the savory product cool completely.
Substitutions and variations
Butter can be replaced with oven-safe margarine with around 80% fat, but the dough tends to have a less buttery flavor and may require less water, because the amount of water varies between brands. Add liquid only after testing the dough for binding.
Chicken breast can be replaced with skinless and boneless thighs in the same quantity. The filling becomes juicier; cook evenly to 74°C in the center before shredding.
For a cream cheese version, place up to 8 g of firm cream cheese in the center of each pie and reduce the chicken filling by the same amount. Avoid mixing large amounts of curd cheese into the filling, as this increases humidity and makes it difficult to cut cleanly and make the base stable.
The olive can be omitted without altering the structure. Adjust the salt of the filling later, as the olive contributes a lot to the saltiness.
How to store
After baking, do not leave the pies at room temperature for more than 2 hours. Wait just long enough for them to lose their intense heat, place in a sealed container and refrigerate. Consume within 3 to 4 days.
To freeze, cool completely, wrap the pies individually or separate into well-protected layers and freeze. For better dough texture, preferably use within 2 months. Reheat in the oven at 180°C until the center is hot; If you use a thermometer, the reheated filling should reach 74°C.
How to serve / side dishes
Serve warm, when the dough is still crispy and the filling is creamy. For a snack or party, it can be served alone; for a light meal, combine with leafy salad, tomato and acidic sauce to balance the richness of the pasta.
Common mistakes
Why was the dough hard instead of crumbly?
The most common causes are kneading the dough, adding too much water or letting the butter get too hot. Mix just until it comes together and stop as soon as the dough holds together when pressed.
Why did the pie fall apart when unmolding?
The dough may be too thin on the sides, the filling may have been added too much or the pie may have been removed from the mold while it is still very hot. Maintain approximately 3 mm thickness on the base and sides, respect the amount of filling and wait 10 to 15 minutes before removing from the mold.
Why was the bottom wet or hardened?
Hot filling or filling with loose liquid moistens the dough before and during the oven. It can also occur if the oven is not fully preheated. Use cold, thick filling and only bake when the oven has stabilized at 190°C.
Why did the lid open during the oven?
Usually the seam was not pressed enough or there was stuffing above the edge. Leave space for the lid, join the two layers of dough around the entire circumference and remove the excess only after sealing.