This formula uses 500 g of flour and up to 390 g of water, which corresponds to 78% hydration. The final 20 g goes in little by little: if the flour loses its structure, spreads like cream or is unable to absorb the water, stop beforehand. With weaker domestic flour, working between 74% and 76% hydration is often more manageable than insisting on 78%.
Ingredients
For the dough
• 500 g of wheat flour for bread, preferably with good proofing strength
• 390 g of total water, 350 g for the initial mixture, 20 g to incorporate yeast and salt and up to 20 g reserved for final adjustment
• 10 g of fine salt
• 3 g of instant dry yeast
To the bench
• 30 g of wheat flour or fine semolina for dusting
Preparation method
1. Hydrate the flour
Mix the 500 g of flour with 350 g of water until there is no dry flour left. The dough will be lumpy and sticky. Cover and let rest for 20 minutes. This rest begins the hydration of the gluten before requiring strength from the dough.
2. Add yeast, salt and reserved water
Add the yeast, salt and 20 g of water. Pinch the dough between your fingers and make folds inside the bowl until the ingredients disappear into the dough. Work for 3 to 5 minutes, until it starts to become smoother and more elastic. Add the final 20 g of water in two 10 g installments, only when the previous installment has been absorbed. If the dough is already very fluid and cannot hold a fold, do not force maximum hydration.
3. Make the folds to build structure
Cover the bowl and do four sets of folds, 20 minutes apart. In each series, slightly wet your hands, pull one edge of the dough until you feel resistance and fold it over the center; rotate the bowl and repeat on four sides. Stop the series when the dough is more tense and forms a rounded volume again. Along the folds, it should go from sticky and loose to smoother, more elastic and able to hold bubbles.
4. Finish block fermentation
After the last fold, let the dough ferment without stirring until it is visibly aerated, with a slightly convex surface, small bubbles along the sides and an increase of approximately 60% to 75% in volume. In an environment of 24 to 26 °C, this usually takes another 60 to 90 minutes. Use the appearance of the dough as your main reference: a dough that is swollen, shaky when you move the bowl and full of gas is ready to share.
5. Heat the oven well
About 45 minutes before baking, heat the oven to 250°C with a stone, bread steel or heavy baking tray inverted on the center rack. If using steam, place a heavy-duty metal baking sheet on a lower rack. Do not use a glass container to hold water in a very hot oven.
6. Divide without expelling gas
Sprinkle the counter generously and tip the dough all at once, without pressing. Sprinkle the surface of the dough and, using a spatula or scraper, cut into two approximately equal parts. Instead of kneading or rolling, just arrange each part into a long rectangle, gently pulling on the ends. Do not press to “fix” the alveoli: irregular bubbles are part of the desired result.
7. Make the final fermentation
Transfer the two rectangles to well-dusted baking paper or a floured proofing cloth. Cover without touching the dough and let rise for 35 to 50 minutes. The pieces should feel lighter, fluffier, and full of air, but still maintain some tension around the edges. If they start to spread quickly and lose height, bake without waiting too long.
8. Bake with high heat and initial steam
Slide the bread, with the paper, onto the hot surface. If using the steam tray, with heat gloves on and your face away from the oven, pour about 150 ml of boiling water into the metal tray and close the door immediately. Lower the temperature to 235°C and bake for 12 minutes. Open the door for a few seconds to release excess steam, lower to 225°C and bake for another 13 to 18 minutes, until the skin is golden brown.
9. Cool before cutting
Remove the ciabatta and leave it on a wire rack for at least 1 hour. Cutting while the crumb is still releasing a lot of steam can make it sticky and compress part of the honeycomb structure.
Right spot / how to know it’s ready
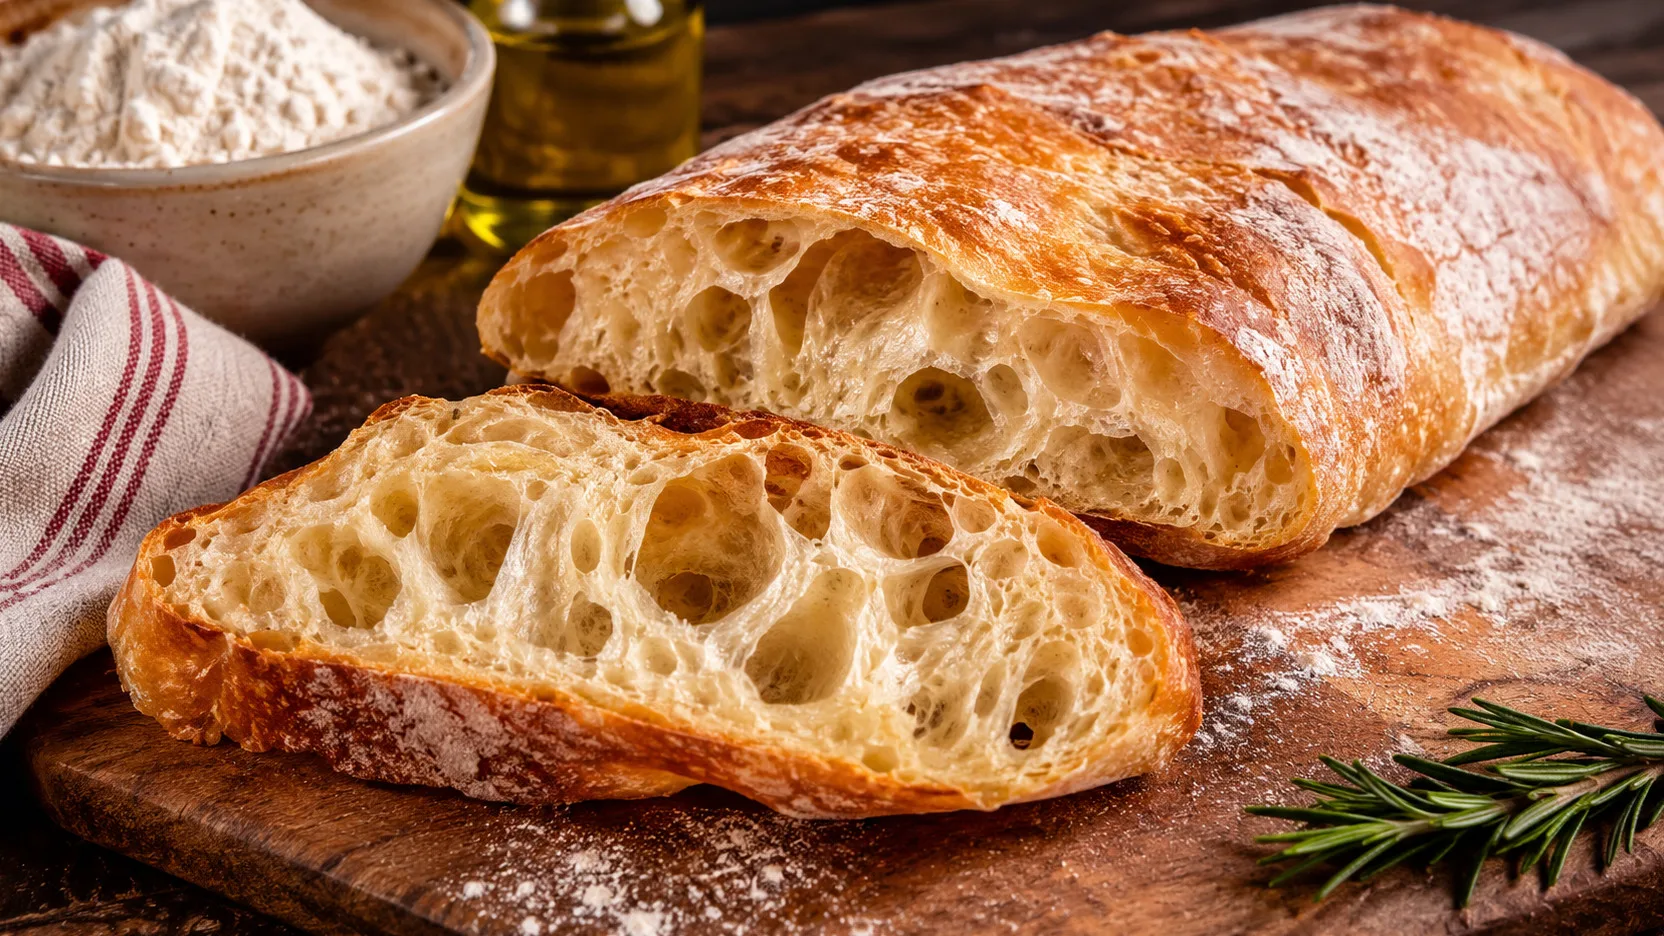
The ready-made ciabatta has an intense, thin golden skin, firm sides and a feeling of lightness when lifted. The base should sound hollow when tapped. If you use a thermometer, the center can reach approximately 96-99 °C. Once cold, the crumb should be moist and elastic, with no raw or gummy stripe at the base, and have cells of different sizes rather than a uniform network.
Tips for the recipe to work out
Adjust the water to the flour, not the other way around
Stronger flour better supports a dough with 78% hydration. If your homemade flour remains strained even after the first few folds, use less than the final 20 g of water. Adding flour during kneading changes all the proportions; reserving water from the start is a more predictable adjustment.
Use water and scraper to deal with stickiness
Slightly wet hands and a bench scraper allow you to fold and divide the dough without incorporating excess flour. Too much flour in the dough can harden the crumb and reduce expansion.
Stop folding when the dough has strength
Folds serve to create structure, not to accumulate unnecessary series. If the dough is smooth, elastic and difficult to stretch without resistance, let it prove. Overworking an already strong dough can limit extensibility which favors an open crumb.
Don't just wait for the clock
Fermentation changes with temperature, flour and actual amount of yeast. Observe volume, bubbles, lightness and jitter of the dough. Dividing a dough that is still dense usually results in a closed crumb; Waiting too long can make it lose structure and spread.
Give the baking surface time to dry
Steam helps in the beginning, when the bread needs to expand. Then, releasing the steam and finishing in a drier environment favors a thin, crispy skin rather than a pale, rubbery surface.
Substitutions and variations
If regular flour is weaker
Make the recipe with 370 to 380 g of total water, equivalent to 74% to 76% hydration. The crumb may be a little less open, but the dough tends to preserve its shape better. In the next batch, increase the water in steps of 5 to 10 g if the dough has held the folds well.
If you use active dry yeast
Use about 4 g and hydrate it in part of the water in the recipe according to the manufacturer's instructions. For fresh yeast, about 9 g is a practical substitution. Fermentation speed may change, so keep visual signs as a reference.
If you want to use wholemeal flour
Replace up to 50 g of white flour with wholemeal flour to keep the ciabatta profile still light. Bran absorbs more water and interferes with the gluten network; Therefore, the crumb tends to be less open and may require a small water adjustment.
If you don't have stone or oven steel
Preheat a thick roasting pan upside down for 45 minutes. It doesn't store as much heat as a stone or steel, but it creates a hotter base than baking in a cold pan.
How to store
Ciabatta is best the day it is baked. Once completely cool, keep it at room temperature with the cut side facing down and light protection for up to 24 hours to better preserve the skin. For 1 to 2 days, pack well; the shell softens, but can be recovered after a few minutes in a hot oven. To store it for longer, freeze cold bread, whole, in halves or slices, well wrapped. For best texture, consume within about 1 month and reheat after thawing.
How to serve / side dishes
Serve the ciabatta the same day with olive oil, soups, antipasti or use it in sandwiches. To recover the crust from day-old bread, heat it at 180°C for 6 to 8 minutes and let it rest for a few minutes before slicing.
Common mistakes
Why was the ciabatta compact and with few cells?
The most common causes are insufficient fermentation, dough not strong enough to retain gas or loss of gas in the division. Wait for clear signs of aeration before dividing, make folds just until the dough holds its structure and cut the pieces without kneading, squeezing or rolling.
Why did the ciabatta flatten and spread?
The hydration may have exceeded the capacity of the flour, the folds may have been insufficient or the dough may have fermented too much. In the next attempt, retain 10 to 20 g of the final water, build strength before the long rest and bake as soon as the pieces are well aerated, before they lose tension.
Why did the crumb become gummy?
This usually happens when the bread comes out of the oven early, when the hydration is too high for the structure obtained or when it is cut while it is still hot. Look for a very golden skin, firm sides, center close to 96-99 °C if you have a thermometer and allow it to cool completely.
Why was the skin thick instead of thin and crunchy?
Oven underheating, lack of steam at the beginning or excessive time at low temperature can thicken the shell. Preheat the cooking surface well, concentrate the steam in the first few minutes and finish the bread in a dry and sufficiently warm environment.
Why didn't using 78% hydration guarantee big holes?
High hydration helps, but does not replace fermentation, gluten strength, careful division and oven heat. A very wet and weak dough can produce just the opposite: low, moist and closed bread. The goal is to use as much water as the flour can hold with structure.