Ingredients
For the dough
• 500 g strong wheat flour, preferably with around 11% to 12.5% protein
• 290 g of water at room temperature
• 5 g of instant dry yeast, or 15 g of fresh yeast
• 10 g of malt extract for baking
• 10 g of fine sea salt
• 25 g of extra virgin olive oil
For the baking dish
• 20 g of extra virgin olive oil
To the brine and the surface
• 70 g of water
• 45 g of extra virgin olive oil
• 4 g of fine sea salt
• 2 g of medium-grain sea salt, to finish
Preparation method
1. Mix the dough base
Place the water, yeast and malt extract in a large bowl and mix. Add the flour and stir until there are no dry spots left. Let it rest for 10 minutes for the flour to hydrate before adding the salt and olive oil.
2. Develop the dough
Add the salt and work the dough for about 3 minutes. Add the 25 g of olive oil in two or three additions, incorporating well before adding the next one. Knead for another 6 to 8 minutes, by hand or on low to medium speed in a mixer, until smooth, elastic and still soft. Avoid adding flour just because the dough sticks slightly.
3. Make the first fermentation
Cover the bowl and let the dough ferment for 45 to 60 minutes, in a place without a draft, until it gains volume clearly and becomes more aerated. It doesn't need to double in size.
4. Transfer to the baking dish without expelling the gas
Spread the 20 g of olive oil on the bottom and sides of a baking dish measuring approximately 30 × 40 cm. Transfer the dough to the center, turn it once so it is lightly greased and let it rest for 20 minutes. With your fingertips and open hands, slowly stretch the dough towards the corners. If it shrinks, stop for 10 minutes and continue later; do not force or flatten any accumulated air.
5. Ferment in the pan
Cover loosely and let rise for 35 to 50 minutes, until the dough relaxes, becomes visibly light and has small bubbles beneath the surface. Meanwhile, heat the oven to 230°C for at least 30 minutes, with a rack in the medium-low position.
6. Form dimples and apply the brine
Mix the 70 g of water, the 45 g of olive oil and the 4 g of fine salt until you obtain a temporary emulsion. Lightly grease your fingers and press the dough with the tips of three fingers, creating deep dimples across the entire surface, almost to the bottom of the pan, but without tearing the dough. Work in loose lines and leave puffy areas between marks. Pour the brine slowly, spreading it so that it also concentrates in the dimples. Finish with medium grain salt.
7. Take the last break
Let the focaccia rest uncovered for another 25 to 35 minutes. It should be light and with the dimples still clearly visible; Some of the brine will accumulate in the depressions, which is to be expected.
8. Bake until golden brown
Bake in the oven at 230°C for 18 to 20 minutes. The surface should be golden to amber, with toasted edges and a firm bottom. If your oven browns too quickly on top, reduce it to 220°C in the final minutes rather than removing the focaccia too soon.
9. Cool without muffling the base
Remove the focaccia from the pan as soon as you can handle it safely and transfer it to a wire rack. Wait at least 15 minutes before cutting. This prevents the steam trapped in the pan from softening the bottom.
Right spot / how to know it’s ready
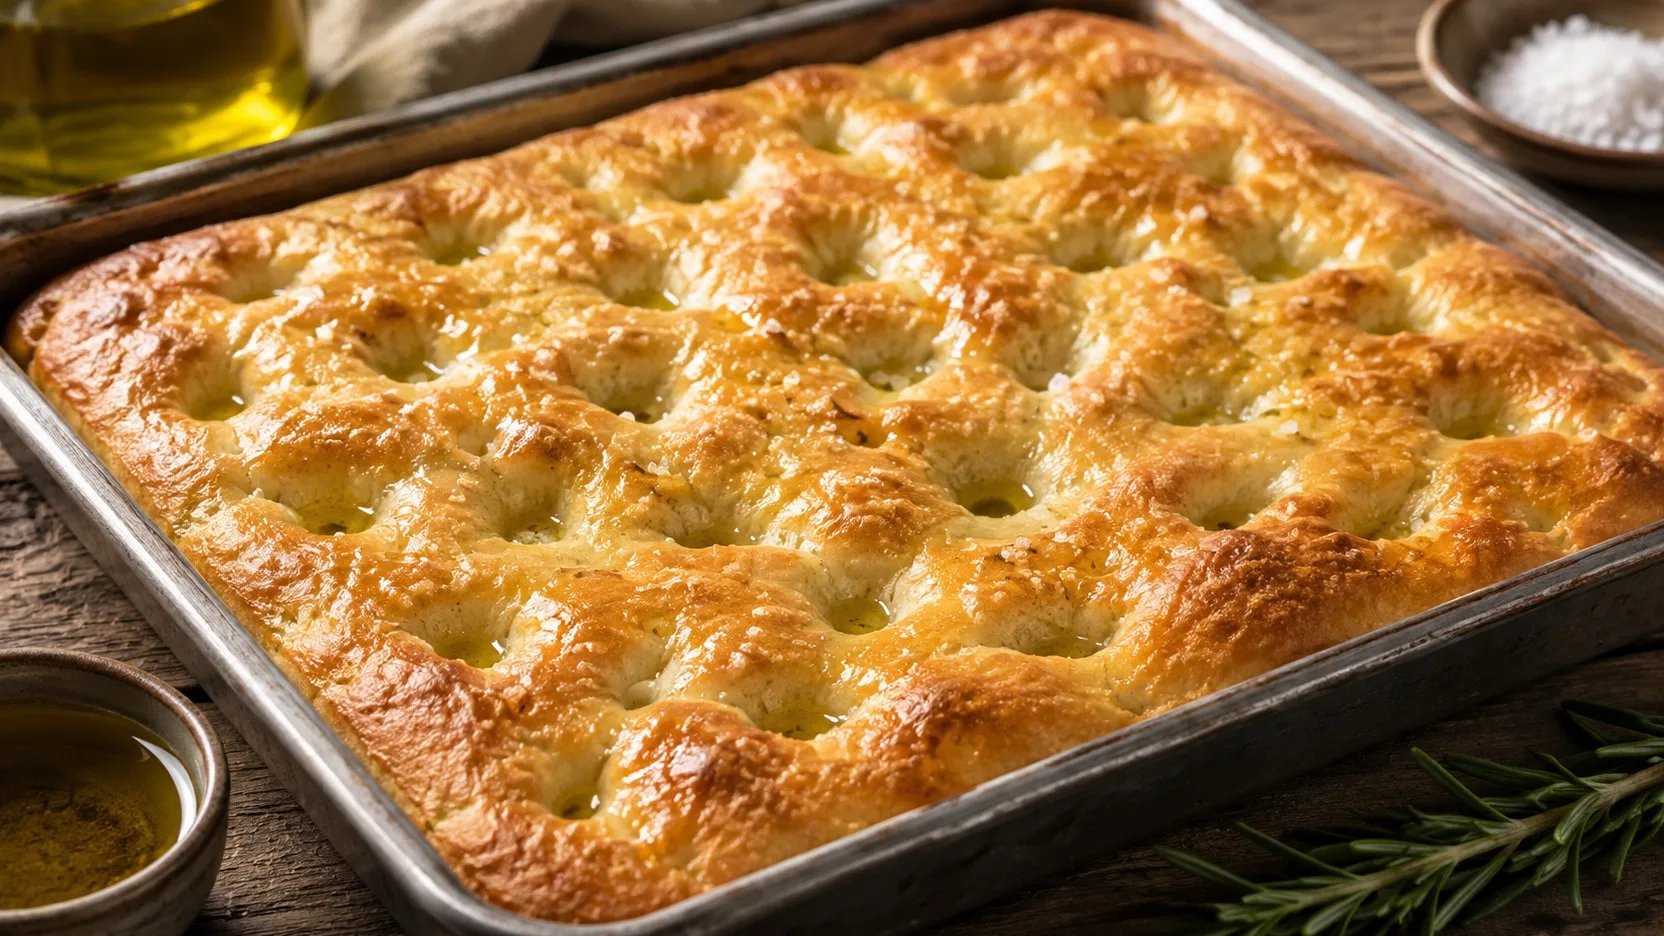
The finished focaccia is relatively short, with a golden to amber surface and defined dimples, some still shiny with olive oil. When lightly pressing a high area, the dough should offer resistance and partially spring back. The edges need to be nicely browned and the bottom should look dry and firm, not pale or damp. The crumb should be soft and irregular, without the compact texture of heavy bread.
Tips for the recipe to work out
Don't turn focaccia into a tall pizza
Use a wide baking dish so that the dough spreads into a low layer. If you use a much smaller pan, the focaccia will be tall, change the crust to crumb ratio, and require more baking time.
Rest whenever the dough resists
Elastic dough that returns to the center is still tense. A 10-minute rest is more efficient than pressing hard, because it allows you to open up to the corners without expelling all the fermentation gas.
Make deep dimples, but don't tear the bottom
The depressions must be marked enough to receive the brine. Shallow pressures disappear in the oven; Tears, on the other hand, create dry spots and can cause the dough to stick to the pan.
Use the brine immediately after mixing
Water and oil separate quickly. Mix, pour without delay and spread with your hands to distribute liquid and fat evenly between the dimples.
Preheat the real oven
Focaccia needs intense heat from the beginning to set the structure and brown before the crumb loses moisture. Thirty minutes of preheating is a practical guideline for a typical home oven.
Substitutions and variations
If you can't find strong flour, use regular wheat flour and start with 270 g of water. Add the rest little by little only if the dough accepts it; flours with lower absorption capacity may become excessively loose with all the water. Malt extract can be replaced with 8 g of honey. The flavor and browning change slightly, and the version no longer follows the classic malt-based formulation, but the fermentation remains functional. Instant dry yeast can be exchanged for 15 g of fresh organic yeast. Dissolve the fresh in water before mixing the flour. Rosemary, onion or olives can be used as a variation, but the simple version with olive oil and salt makes the character of the Genoese focaccia more evident.
How to store
Once completely cooled, keep the focaccia well packaged at room temperature and preferably consume within 1 day, when the surface and crumb are at their best. On the second day, reheat for a few minutes in the oven at 180°C to regain some of the crispiness. Avoid the refrigerator, which tends to accelerate the drying of bread. To store for longer, cut into pieces, wrap well and freeze for up to about 2 months. Reheat directly from the freezer in a moderate oven until the center is hot and the surface is dry again.
How to serve / side dishes
Serve warm or at room temperature, cut into strips or squares. It works as a table bread, snack or base for a simple appetizer. To preserve the texture, avoid very moist toppings for long periods before serving.
Common mistakes
Why was the focaccia dense?
The most common causes are insufficient fermentation, too much flour added during kneading or too much pressure when rolling out the dough in the pan.. Expect signs of lightness and bubbles before moving forward, and work with greased hands rather than flouring the counter repeatedly.
Why did the dimples disappear?
The dough may have been marked superficially or was still very tense. Make the dimples after the dough relaxes in the pan and press firmly, without tearing.
Why did the surface turn pale?
A poorly preheated oven, low temperature or early removal reduce the browning. Bake until the color is clearly golden to amber and also check the base before considering it ready.
Why did the bottom become soft?
This usually happens when the focaccia comes out of the oven before the base has set or remains inside the hot pan for a long time, trapped in the steam. Give it enough color in the oven and transfer to a wire rack immediately after baking.