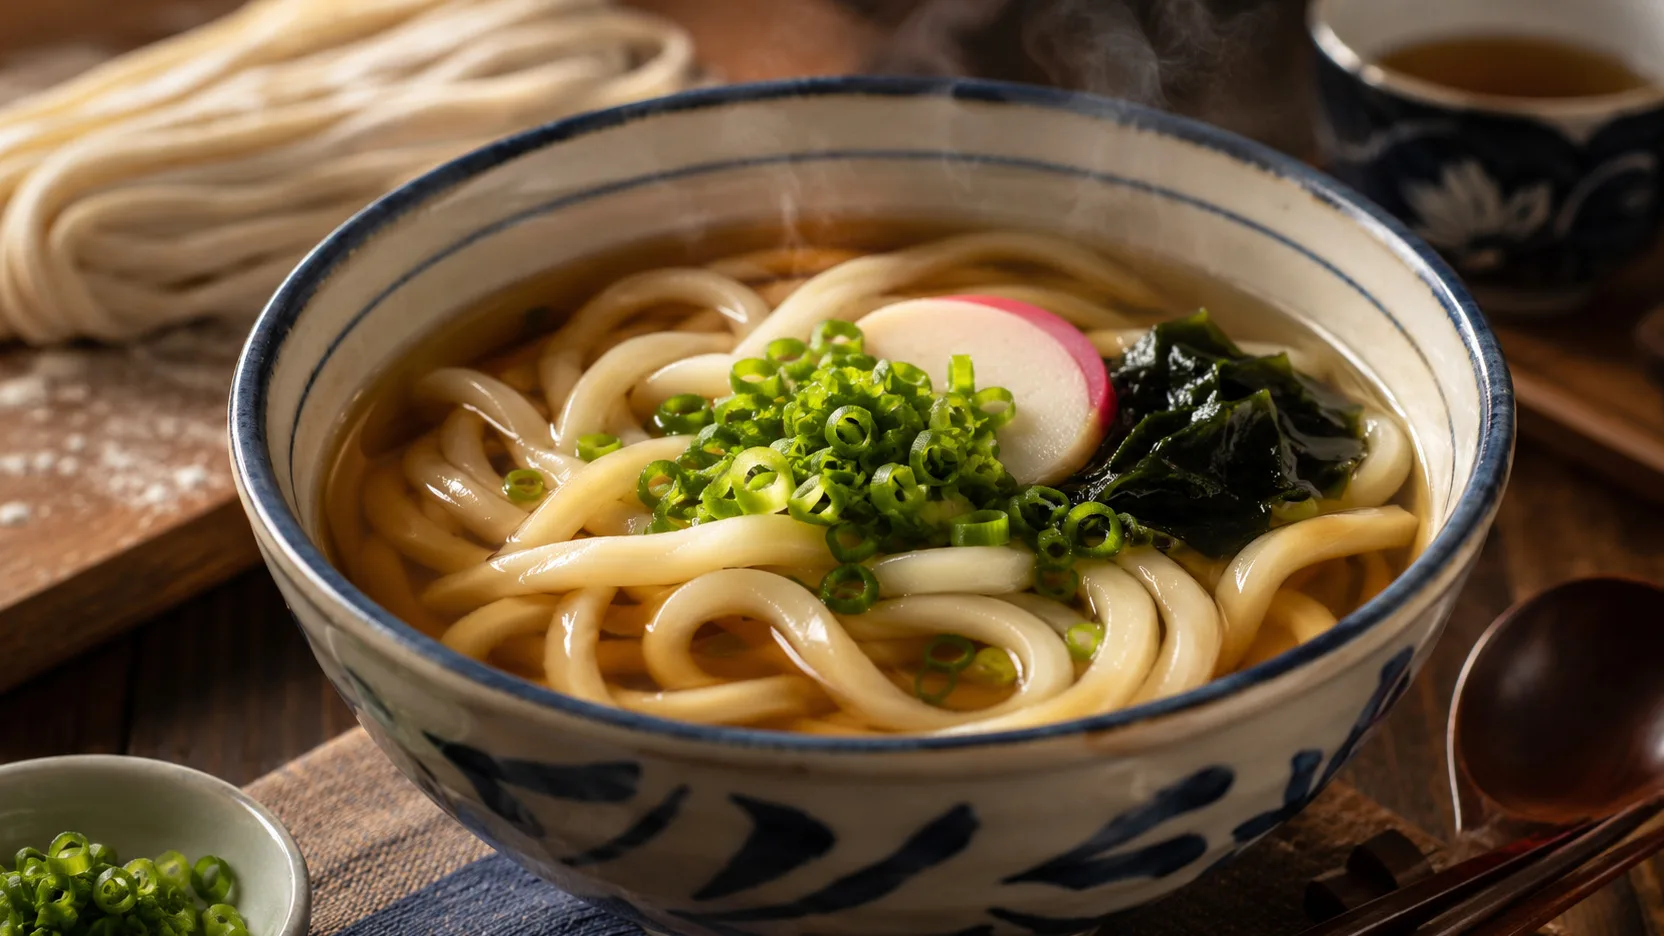
The secret to this udon is treating the dough and broth as two parts of the same dish. The dough uses little water and salt to gain structure; resting and repeated pressing makes the gluten more uniform. Once cooked, washing in cold water removes excess starch from the surface and firms the texture before the noodles quickly return to the heat of the kake broth.
Ingredients
For the udon dough
• 400 g of common wheat flour, preferably with a protein content of around 10% to 11%
• 180 g of water at room temperature
• 20 g of fine salt
• 40 to 60 g of potato starch or corn starch, for rolling out and cutting the dough
For dashi awase
• 1.3 liters of water
• 12 g of dried kombu
• 25 g katsuobushi, dried bonito flakes
For the kake broth
• 1.2 liters of the dashi prepared above
• 45 ml of soy sauce
• 30 ml of mirin
• 10 g of sugar
• 3 g of fine salt, more if necessary after tasting
To finish
• 2 chives, finely sliced
• 8 thin slices of kamaboko or narutomaki, optional
• 8 g of dried wakame, hydrated and well drained, optional
• Shichimi togarashi to taste, optional
Preparation method
1. Prepare the salt water
Completely dissolve the 20 g of salt in the 180 g of water. This salt water needs to reach the flour evenly; do not pour dry salt directly onto the dough.
2. Hydrate the flour without trying to knead yet
Place the flour in a large bowl. Add about a third of the salt water and mix with your fingertips, breaking up any small clumps. Repeat with the remainder in two more additions. After 3 to 5 minutes, the flour should look like moist crumbs of small, even lumps. Squeeze a portion in your hand: it should come together when squeezed, even if the whole thing still feels dry.
3. Bring the dough together and make the first rest
Press the groats into a rough block. Don't add water just because the dough seems tough; This low hydration is part of the udon's texture. Place the dough in a food-safe bag or wrap tightly in plastic and let it rest for 30 minutes at room temperature.
4. Squeeze, fold and repeat
With the dough protected inside a sturdy bag, press with your body weight until it flattens into a disc. Fold the disc in thirds, rotate and press again. Repeat this cycle 5 to 8 times, until the dough is visibly smoother and more elastic. If you prefer not to use your feet, do the same with the heel of your hands, in short steps, as the dough is firm.
5. Give the main rest
Shape the dough into a ball or thick disk, seal it again in the bag and let it rest for 1 hour and 30 minutes. In a very hot environment, 1 hour is usually enough; in a cool kitchen, it can take up to 2 hours. In the end, the dough should give way to your thumb without cracking at the edges and come back slowly.
6. Prepare the dashi
While the dough rests, place the water and kombu in a pan and let it hydrate for 30 minutes. Heat over medium-low heat. Remove the kombu when small bubbles appear at the bottom and the water is close to boiling. Add the katsuobushi, let the liquid return to a boil, turn off and wait about 10 minutes, until the chips sink. Strain without squeezing. Measure 1.2 liters for the broth.
7. Season the kake broth
Bring the dashi to low heat with the mirin, soy sauce, sugar and 3 g of salt. Heat until slightly shivering, without letting it reduce for too long. Taste: The broth should seem a little saltier when taken alone, because the unseasoned udon will soften it. Adjust the salt in small amounts and keep warm, without boiling hard.
8. Roll out the dough to the right thickness
Sprinkle the counter with starch and roll out the dough with a rolling pin, rotating it to maintain a uniform thickness. Aim for about 3mm. The dough should be firm but flexible, without tearing at the edges. Sprinkle more starch on the surface before loosely folding into thirds, without pressing the layers together.
9. Cut the udon
Using a large, sharp knife, cut strips approximately 4 mm wide. Separate the strands immediately and wrap them in a light layer of starch so they don't stick together. Because the dough swells as it cooks, the raw strands should look a little thinner than the desired udon in the bowl.
10. Cook in plenty of water
Boil 4 to 5 liters of water in a large pan, without salt. Release the excess starch from the strands and cook the udon in two batches if the pan is not large. Stir gently for the first 30 seconds to prevent the strands from sticking. After the water returns to a boil, maintain a constant boil, without boiling over. Start tasting at 9 minutes; In general, 3mm thick wires take about 10 to 12 minutes.
11. Wash to firm the texture
Drain the udon and immediately rinse under cold running water. Move and rub the strands gently between your hands for about 1 minute, until the surface no longer feels sticky and the water comes out much less cloudy. Drain well. To serve hot, dip the rinsed udon for 20 to 30 seconds in clean boiling water and drain again.
12. Assemble the bowls
Divide the warmed udon between four bowls. Cover each portion with about 300 ml of very hot kake broth. Finish with chives and, if desired, wakame and kamaboko or narutomaki. Serve immediately, with shichimi on the side.
Right spot / how to know it’s ready
The ready-to-roll dough is firm and smooth, but not brittle: when you press it with your finger, the mark appears and slowly regains part of its shape. Once opened, there should be no deep cracks on the edges.
Cooked udon should have a fully hydrated center, without a white core or raw flour taste. When biting, it offers elastic resistance and then gives way; It should not be hard in the center nor soft and pasty. After washing, the strands are smooth, separated and with a less sticky surface.
The kake broth should remain relatively clear, with a noticeable dashi aroma and a balance of salt, slight sweetness and umami. If the broth is cloudy and thick, the noodles were probably cooked in it or not washed enough.
Tips for the recipe to work out
Do not correct dry dough too soon
For the first few minutes, the dough seems drier than bread dough. Rest redistributes moisture. Adding water beforehand makes the udon softer and reduces the elastic texture.
Use starch to open and separate the strands
Potato or corn starch creates a dry barrier that helps the cut strands stay separated. Sprinkle as much as necessary, but shake off any excess before adding to the pan.
Cook the noodles out of the broth
The cooking water contains a lot of starch. Preparing the udon directly in the kake makes the broth cloudy and changes the concentration of the seasoning. Cook, wash and only then gather noodles and broth.
Judge doneness by the bite
Actual thickness, cut width and boil intensity change time. Use 10 to 12 minutes as a track, not a guarantee; taste a strand and see if the center has lost its floury appearance.
Keep the kake warm, but not reducing
If the broth simmers for several minutes while you finish the noodles, it concentrates salt and soy sauce. Leave it on very low heat or heat it again when assembling.
Substitutions and variations
Vegetable dashi, no katsuobushi
For a distinctly different plant-based alternative to awase dashi, use 1.3 liters of water, 12 g of kombu and about 20 g of dried shiitake mushrooms. Hydrate kombu and shiitake for at least 1 hour in the refrigerator, or longer for more intense flavor. Heat slowly, remove the kombu before boiling and keep the shiitakes for another 5 minutes on low heat before straining. The broth is earthier and less smoky than the version with bonito.
Low protein flour
If the regular flour available is too weak and the udon lacks strength, replace 20% to 30% of it with strong wheat flour. The result is firmer; Using only strong flour may make the dough too tenacious to roll by hand.
Usukuchi instead of regular soy sauce
This formula already works with regular soy sauce. If you use usukuchi, the broth tends to be visually clearer, but the product may be saltier; therefore, adjust the salt only after tasting.
How to store
For best texture, cook the udon close to serving time and keep the broth separate. If you have leftover broth, place it in shallow containers, refrigerate within 2 hours and consume within 3 to 4 days. When reusing, heat until hot.
Cooked udon can be refrigerated in a closed container, but it loses elasticity quickly; use preferably the next day and reheat briefly in boiling water. If you want to make the pasta in advance, it is best to freeze the raw strands already cut into portions well sprinkled with starch and cook directly from the freezer, adding a little cooking time.
How to serve / side dishes
Basic kake udon is complete with green onions. Wakame and kamaboko add contrast without turning the dish into a heavy soup. For a larger meal, serve vegetable tempura or shrimp on the side to preserve the crunch.
Common mistakes
Why doesn't the dough come together and keeps crumbling?
First check that the water and flour have been weighed correctly and that all the salt water has been distributed throughout the flour. Press the lumps and give the initial rest before correcting. Only if there is still completely dry powder after this rest, moisten your hands and continue pressing; pouring extra water directly creates soft spots.
Why was the udon hard in the center?
The thread was probably opened too thick or removed too early. Cut off a cooked thread: if there is a whitish or mealy center, return to cooking and taste in 1-minute intervals.
Why did the udon become soft and inelastic?
The most common causes are dough that is too wet, opening too thin or overcooking. The cold wash also matters: it removes surface starch and stops cooking before final reheating.
Why was the broth too dark or too salty?
Ordinary shoyu darkens more than usukuchi, and prolonged boiling concentrates the broth. Keep the kake on low heat and make the final salt adjustment just before serving.