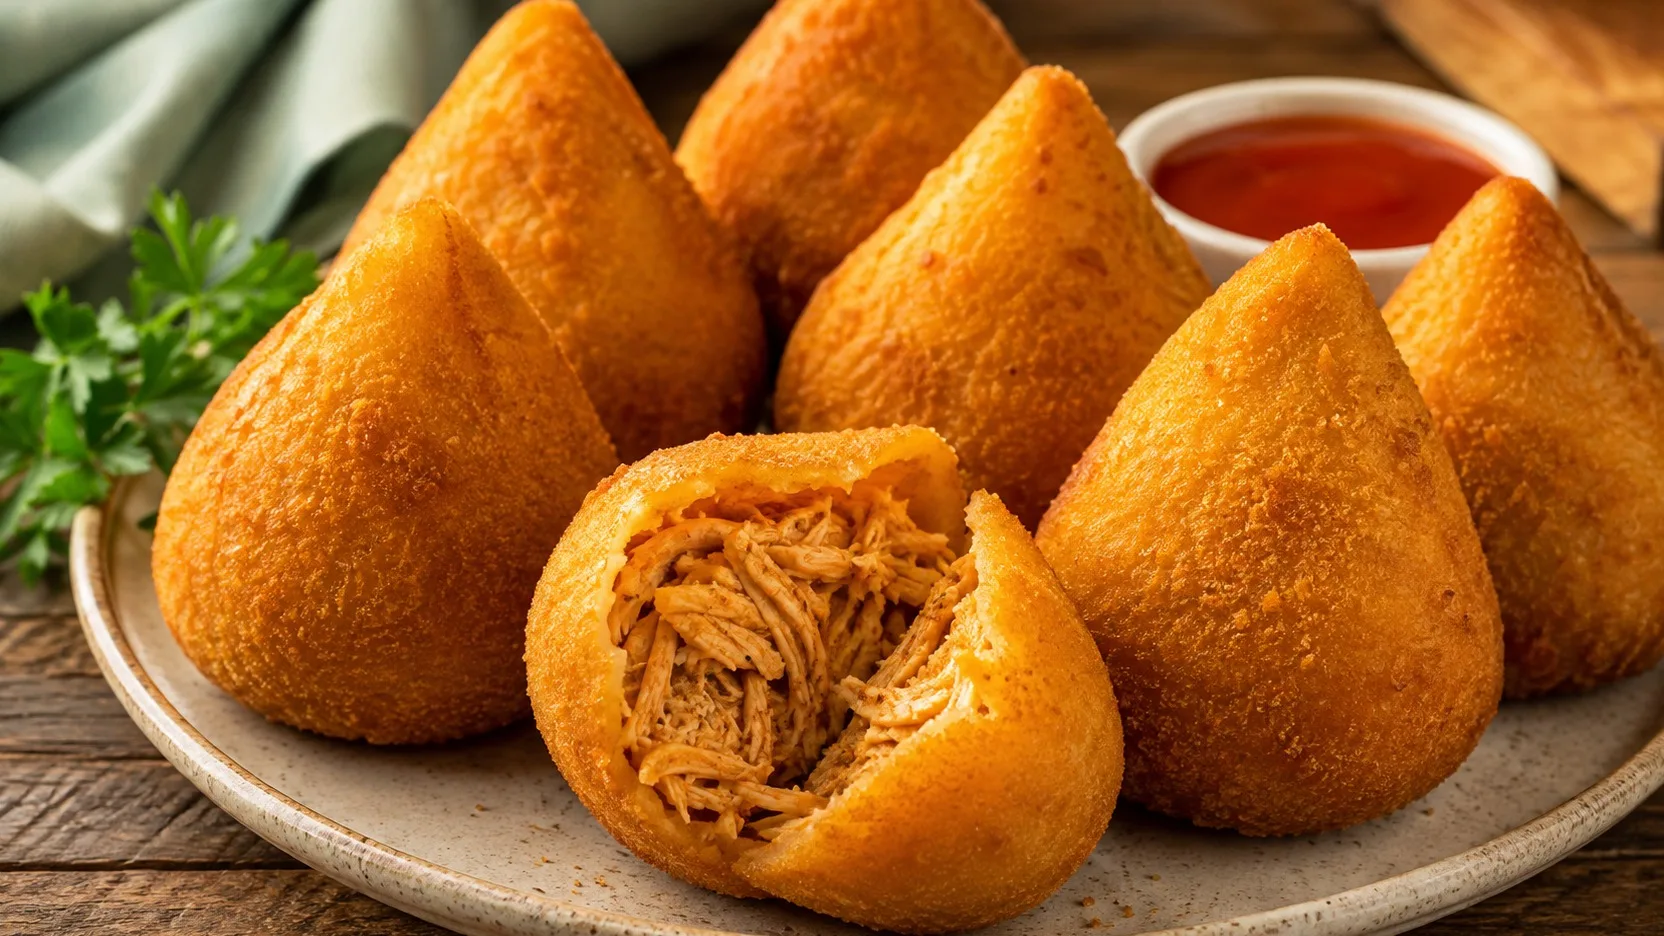
This version involves cooking the chicken itself to use the broth in the pasta. The desired result is a medium-sized drumstick, with a thin, crispy shell, soft dough and well-seasoned filling that remains moist without releasing liquid during modeling.
Ingredients
To cook the chicken and make the broth
• 650 g skinless, boneless chicken breast, cut into 3 large pieces
• 1 liter of water
• 1/2 medium onion, in large pieces
• 2 cloves of garlic, lightly crushed
• 1 bay leaf
• 1 teaspoon of salt
• 6 black peppercorns
For the filling
• All cooked and shredded chicken from the preparation above
• 2 tablespoons of oil or olive oil, about 30 ml
• 1 medium onion, about 140 g, chopped
• 3 cloves of garlic, chopped
• 2 tablespoons of tomato paste, about 30 g
• 1 teaspoon of sweet paprika or paprika
• 120 ml of chicken cooking broth
• 3 tablespoons of chopped parsley and chives
• Ground black pepper to taste
• Salt to taste, only if necessary
For the dough
• 650 ml of chicken cooking broth, strained
• 50 g butter
• 360 g unleavened wheat flour, sifted
• 1/2 teaspoon of salt, or to taste depending on the broth
For breading and frying
• 2 eggs • 80 ml of water
• 250 g of fine breadcrumbs
• About 1.5 liters of neutral oil for deep frying
Preparation method
1. Cook the chicken and reserve the broth
Place the chicken, water, half an onion, garlic, bay leaves, salt and peppercorns in a medium saucepan. Heat over high heat until it starts to boil, lower to maintain a gentle boil, partially cover and cook for about 15 to 20 minutes, or until the center of the thickest part of the chicken reaches 74°C. Remove the chicken, let it cool and shred finely. Strain the broth and measure 770 ml: 650 ml will be used for the dough and 120 ml for the filling. If there is a little missing due to evaporation, top up only as much as necessary with hot water.
2. Make a moist filling, but without loose liquid
Heat the oil in a wide pan, add the onion and sauté for 3 to 4 minutes, until soft. Add the garlic and stir for 30 seconds. Add the tomato paste and paprika and cook for another 1 minute. Add the shredded chicken and 120 ml of broth. Cook over medium heat, stirring, for 5 to 8 minutes, until the broth is absorbed and there is no liquid pooling at the bottom. Turn off the heat, mix the parsley and chives, adjust salt and pepper and spread the filling on a plate to cool completely.
3. Cook the pasta until a film forms on the bottom of the pan.
In a thick-bottomed pan, heat the 650 ml of broth with the butter and salt. When it boils, lower the heat and add the flour all at once. Stir vigorously with a firm spoon or spatula, breaking up the lumps, until a single dough forms. Continue cooking and turning the dough for 3 to 4 minutes. It should come away from the sides and leave a thin, dry film at the bottom of the pan.
4. Cool and knead while the dough is still warm.
Transfer the dough to a clean counter or baking sheet and spread to lose heat for 10 to 15 minutes. When it is warm and can be touched comfortably, knead for 2 to 3 minutes, until it is smooth, elastic and without cracks. Avoid adding flour at this stage; Extra flour tends to make the drumstick heavy and dry.
5. Portion by weight and shape
Divide the dough into 20 portions of approximately 45 g. Separate the filling into portions of approximately 25 to 30 g. Open each portion of dough in the palm of your hand, forming a shell 4 to 5 mm thick, place the filling in the center, bring the edges together and seal well. Shape the rounded base and pull the tip to form the characteristic drop. Each unit will weigh approximately 75 to 80 g before frying, considering the breading.
6. Bread without creating a thick layer
Mix the eggs with the water just until smooth, without forming too much foam. Dip each drumstick quickly in this mixture, let the excess drip off and coat in the breadcrumbs, pressing lightly to adhere. Arrange on a baking tray without overlapping. If the kitchen is hot or the dough is very soft, place the breaded drumsticks in the refrigerator for 15 minutes before frying.
7. Fry in small batches
Heat the oil in a deep pan to 175 to 180 °C. Fry 3 or 4 drumsticks at a time, without crowding the pan, for about 3 to 4 minutes, turning when necessary, until the skin is evenly golden. Try to keep the oil above 170°C during frying. Remove with a slotted spoon and drain on a wire rack or absorbent paper. Wait 2 to 3 minutes before serving, as the filling will be very hot.
Right spot / how to know it’s ready
The stuffing is done when it seems juicy when stirred, but the spatula opens a path at the bottom of the pan without any broth flowing out to take up the space. Once cold, it should maintain the shape of a portion on the spoon, and not form puddles on the plate. The dough is ready to come off the heat when it forms a cohesive block, pulls away from the sides and leaves a dry film at the bottom. After kneading, it should bend without cracking and not stick to your hands. If it breaks at the edges when opening, it has probably cooled too much or been cooked too long. When frying, look for a uniform golden color, firm skin and small bubbles in the oil. A drumstick that darkens in less than 2 minutes indicates oil that is too hot; If it takes a long time to brown and becomes oily, the temperature has dropped too much.
Tips for the recipe to work out
Cool the filling before shaping
Hot filling releases steam and moisture into the dough, which makes sealing difficult and increases the chance of the coxinha opening during frying.
Use a scale for the first batch
Portioning around 45 g of dough and 25 to 30 g of filling helps maintain consistent thickness, frying time and yield. After getting the visual reference, the rest can be modeled more quickly.
Control the oil temperature between batches
When you add many drumsticks at once, the oil cools and the breading absorbs more fat. Wait for the temperature to recover before the next batch.
Do not over-tune the tip region
A tip that is too thin will dry out first and may break. Keep the dough thickness relatively uniform and focus shaping on the shape, not on stretching the dough.
Substitutions and variations
The chicken breast can be replaced with the same amount of boneless, skinless thighs. The filling is juicier and tastier, but may release a little more fat; cook the stir-fry until there is no free liquid left before cooling. The butter in the dough can be exchanged for culinary margarine in the same quantity. The dough tends to be a little softer and the flavor is less buttery, but the cooking technique is the same. For a more irregular and crunchy crust, part of the breadcrumbs can be replaced with panko. The appearance is rougher than the classic coxinha on the cover and frying may brown less evenly.. If you want chicken thighs with cream cheese, use approximately 5 to 8 g of firm culinary cream cheese in the center of each unit and slightly reduce the amount of chicken so as not to overload the dough. Cheese that is too fluid increases the risk of leakage.
How to store
Coxinha is best right after frying. To store already fried units, let the intense steam escape, place in a shallow container and refrigerate without extending the time at room temperature. Keep refrigerated below 5°C and consume within 3 days, counting from the day the chicken was cooked. To reheat, prefer oven or air fryer until the center is very hot; If measured with a thermometer, 74°C is a safe reference for reheating leftovers with chicken. To freeze, place the already shaped and breaded drumsticks on a baking tray without touching them until they are firm and then transfer them to a bag or container suitable for freezing. For best quality, use within 2 months. Fry while still frozen in oil at 165 to 170 °C, in a few batches at a time, until golden and heated through in the center; units of this size usually need around 6 to 8 minutes, with variation depending on the freezer and pan.
How to serve / side dishes
Serve hot, after a few minutes of rest, with pepper sauce, seasoned tomato sauce or lemon on the side. For a snack table, combine with other small snacks and cold drinks; For a snack, a simple salad helps balance the meal.
Common mistakes
Why did the drumstick open when frying?
The most common causes are the filling being too hot or too moist, the edge not well sealed, the dough being too thin at some point or too much filling. If the closure feels flimsy before breading, reshape the unit rather than relying on breadcrumbs to hold it together.
Why was the dough heavy or dry?
Excessive flour and prolonged cooking are the main suspects. Use the indicated amount, cook just until the dough separates and forms a film and knead while it is still warm, without sprinkling flour on the counter.
Why was the drumstick soaked in oil?
The most common cause is frying too many units at once or starting with oil below the recommended range. Work in small batches and wait for the oil to return to at least 175°C before adding the next batch.
Why did the breading come loose?
Excess liquid from the egg bath or poorly pressed breadcrumbs can create loose spots. Let the excess drip off, cover the entire surface and press lightly so the layer adheres before frying.